Show the component, the decision, and its evidence.
A working script for the Logic house builder, source inspection, shared Registry replay, product anatomy and factory study. Updated September 30, 2026.
Use the short script for an overview. For a working session, open the five views below, then follow the ten-minute sequence. Keep this guide beside the demo or use Print / save PDF for reading on your phone.
The updated recording below includes graphical product categories, source-derived previews, quick datum controls, study alignment and placement of the archived bathroom model.
Reference demonstration. Source geometry, synthetic product examples and Registry fixtures are distinct datasets. Public visibility does not mean manufacturer adoption, product certification or engineering approval. This guide does not assert that a particular deployment is live; check the links before the call.
Quick preflight
- Open House builder and wait for Ready. Use the 2x6 starting assembly for the main demonstration.
- Open Registry replay and try each of its three examples. Leave Two matching wall edges selected.
- Check that model labels and the selected component are readable at your screen-share size.
- Download a study package and a pinned Registry package before the call. They demonstrate different kinds of evidence.
- Keep a source drawing, a product SVG and the recorded fallback available if rendering or Wi-Fi is unreliable.
Two-minute script
“The idea is pretty simple: we should be able to understand a product, place it in a design, and see what we actually know about the result.
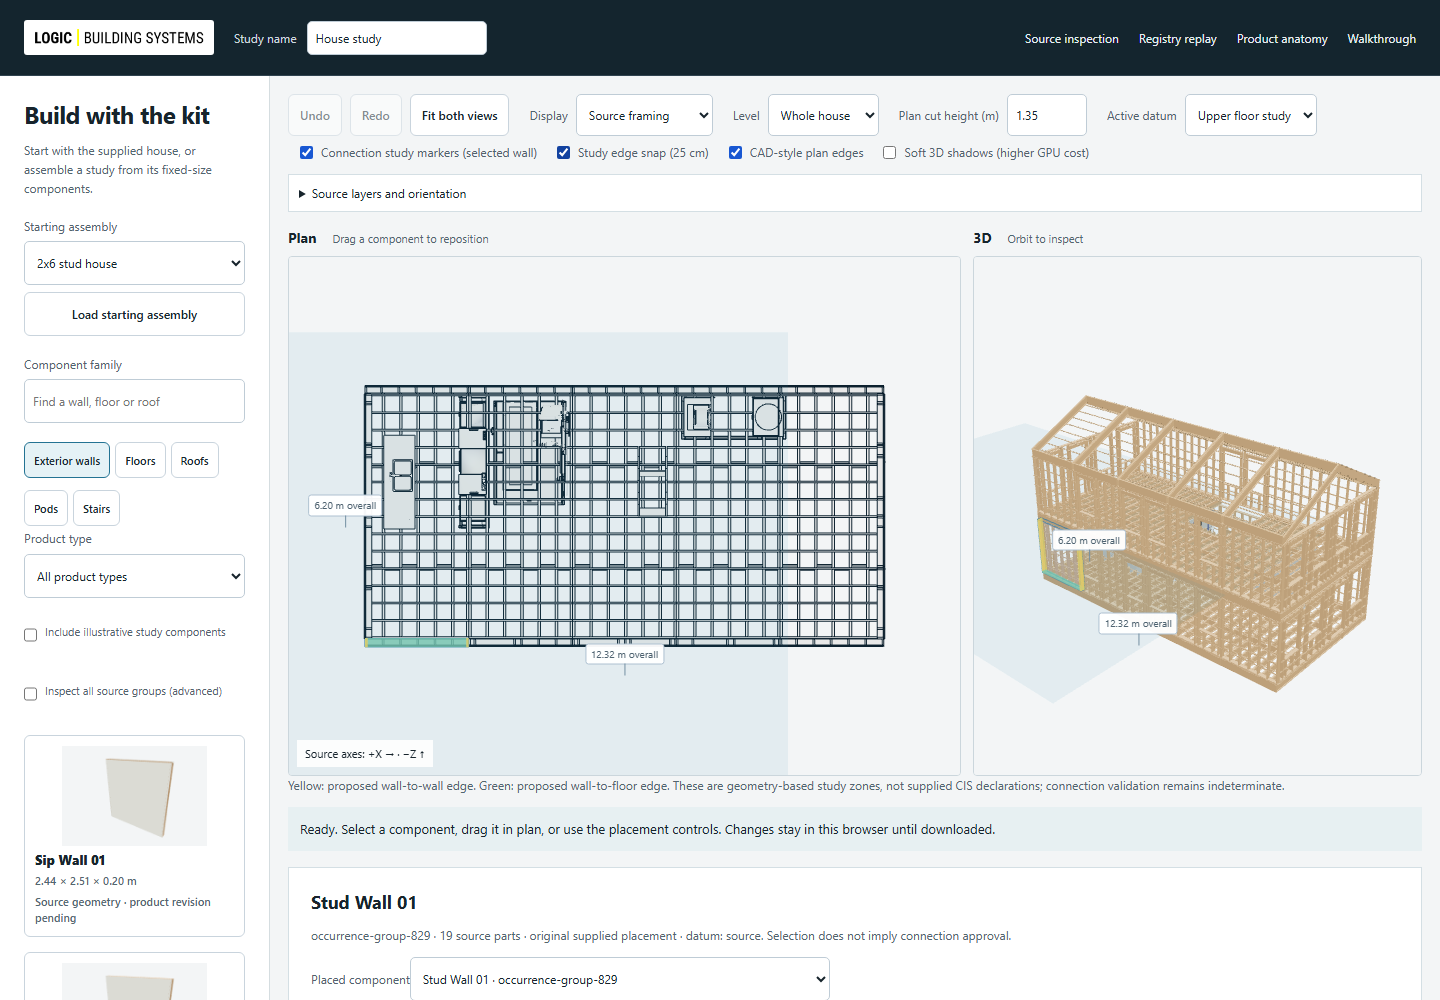
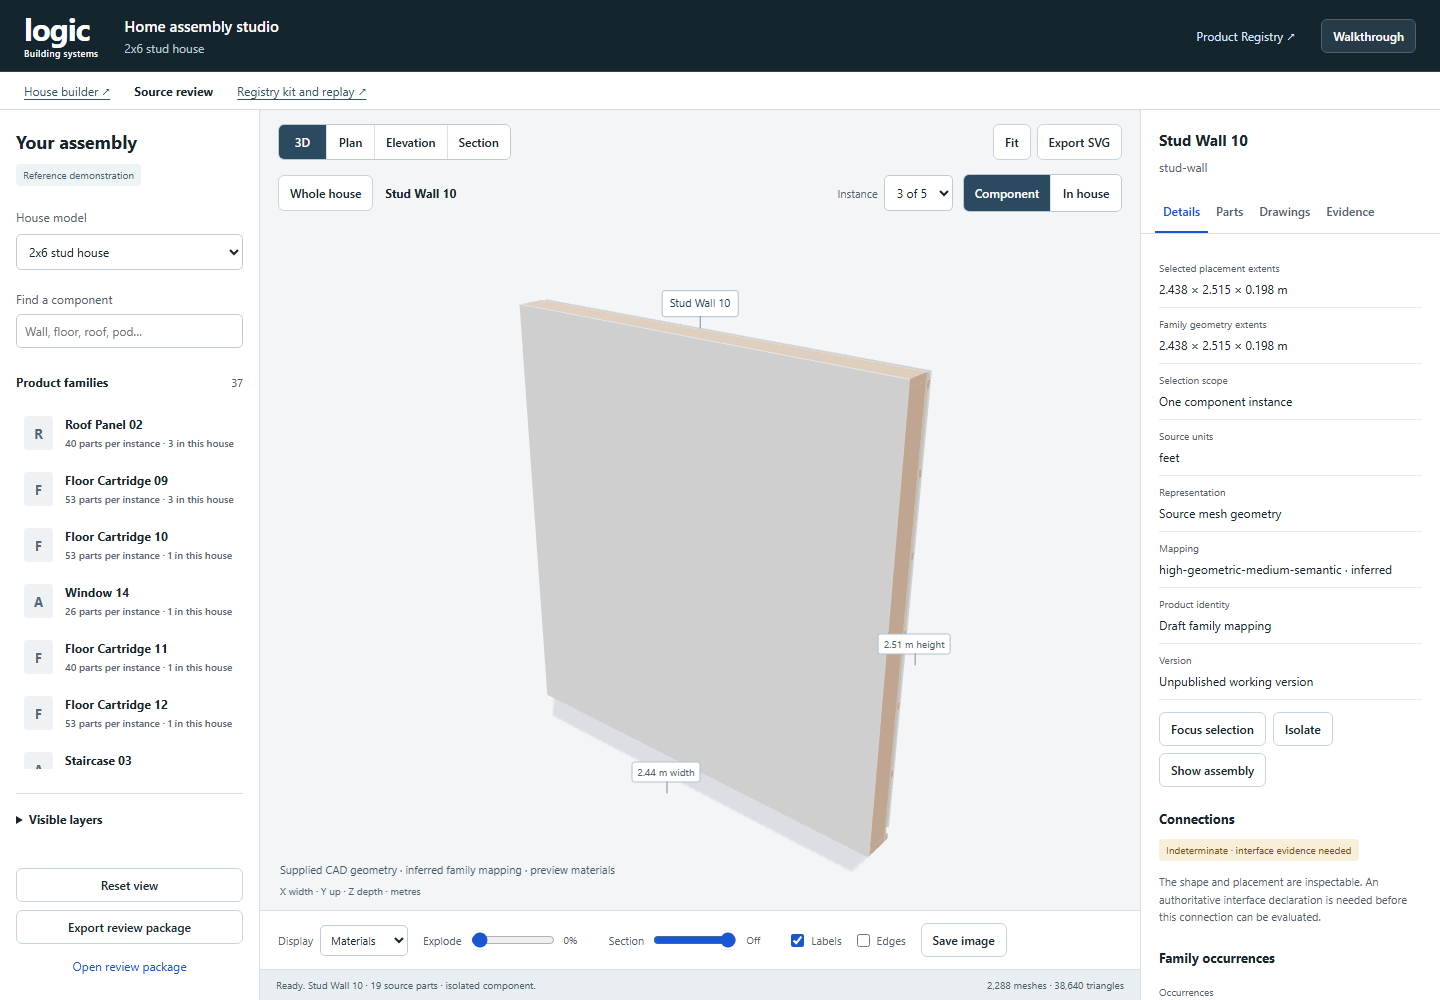
Here’s the house Jason supplied. We can pull out one wall or floor component, see its framing and drawings, and put it back in context. The source has been organized into 85 inferred geometry families and 110 placements. Those are geometry groupings, not yet an approved product catalog.
In the builder, I can move, rotate, duplicate or swap fixed-size components in plan and see the same change in 3D. I can also place a roof component on a tilted study plane. That changes its placement, not its design. The product list counts panels and complete components, rather than every stud inside them.
The Registry example answers a different question: can two interfaces use the same exact product data and produce the same scoped result? Here are a matching pair, an incompatible pair and a case where we don’t have enough information. The export keeps the product versions and the check evidence together.
We’ve also made the product anatomy and factory view easier to inspect. You can see the parts, sections and flow, with assumptions labeled. Kyle’s contribution is still pending, so the illustrative CLT example is not being passed off as his product.
What I’d like us to agree on is the first real product set, which connection facts we need, and who reviews those facts before this goes beyond a reference demonstration.”
Ten-minute working walkthrough
The times are a suggested pace, not a rigid presentation. Let a useful question replace a click.
0:00–0:45
Set the scope
Say: “There are three data lanes here: Jason’s supplied geometry, independent product illustrations, and synthetic Registry fixtures. I’ll keep those separate as we go.”
Show: The builder’s starting-assembly selector. Explain that the source house is a working study and its connection state is indeterminate without authoritative interface data.
0:45–2:15
Make one source component understandable
Open: Source inspection. Search for a stud wall, then select a family. It should isolate one instance. Use Instance to inspect another placement, In house to see its location, and Whole house to return.
Do: Switch Display → Structure. Open Parts, Drawings and Evidence. Show a section or vector drawing.
Say: “We’re inspecting the source, not substituting a generic box. The family identity is inferred. We can review that mapping without changing Jason’s original file.”
Ask: “Does this grouping match how you would actually sell and configure the product?”
2:15–4:15
Change the house without stretching products
Open: House builder. Load 2x6 stud house. Choose Exterior walls and click a graphical product card. Inspect its orbitable preview, then drag it onto plan or 3D to add a fixed-size study component. Select a placed wall, use Focus, move it in plan, rotate it, then Undo.
Do: Choose Upper floor study in the quick Active datum toolbar. Right-click a placed component to reassign its datum, or use Place on selected datum. For a roof, set 4 / 12 pitch and update the study plane. Undo when done.
Show: Enable Show proposed interface zones on a selected wall. Yellow highlights proposed wall edges; green highlights the floor edge. Open Source layers and orientation to inspect layers and X/Z axes.
Say: “We can inspect and place the supplied component. The plane is our study assumption, and the panel keeps its source dimensions. Product and connection declarations are the next evidence layer.”
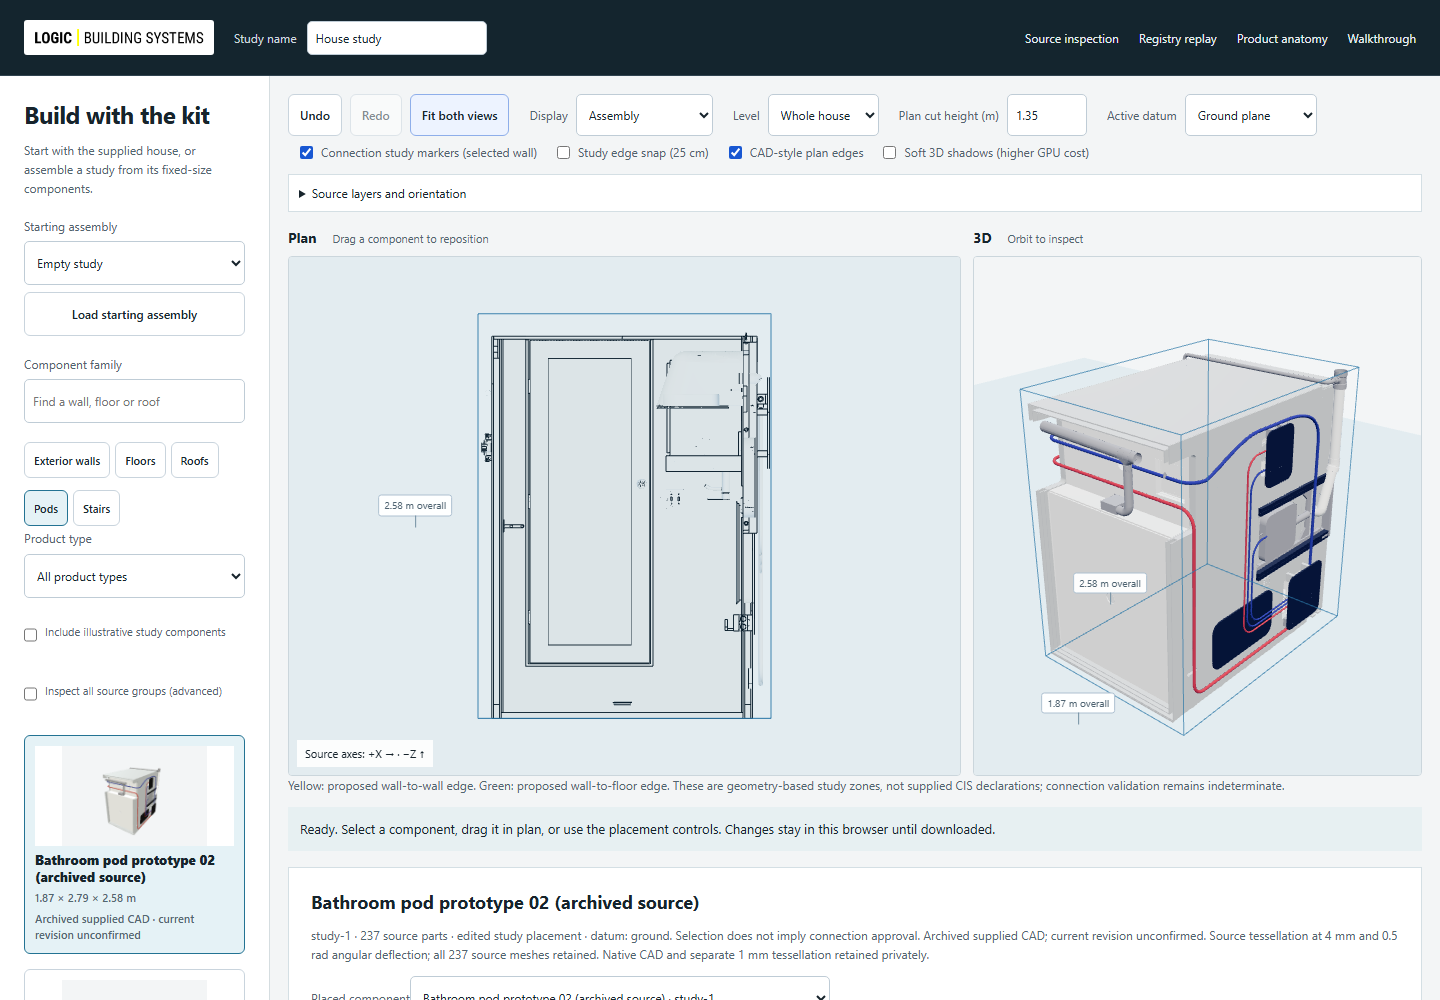
Show: Choose Pods and inspect the archived bathroom prototype. Use the separate bathroom steps below to place it in an empty study. Keep illustrative substitutes off during the source review. Download the study package and show the draft CTO, assembly GLB and plan SVG outputs.
Ask: “Which edits should be allowed for a customer, and which should trigger a manufacturer review? Is this the current product family and intended starting-house revision?”
4:15–6:15
Replay an exact Registry decision
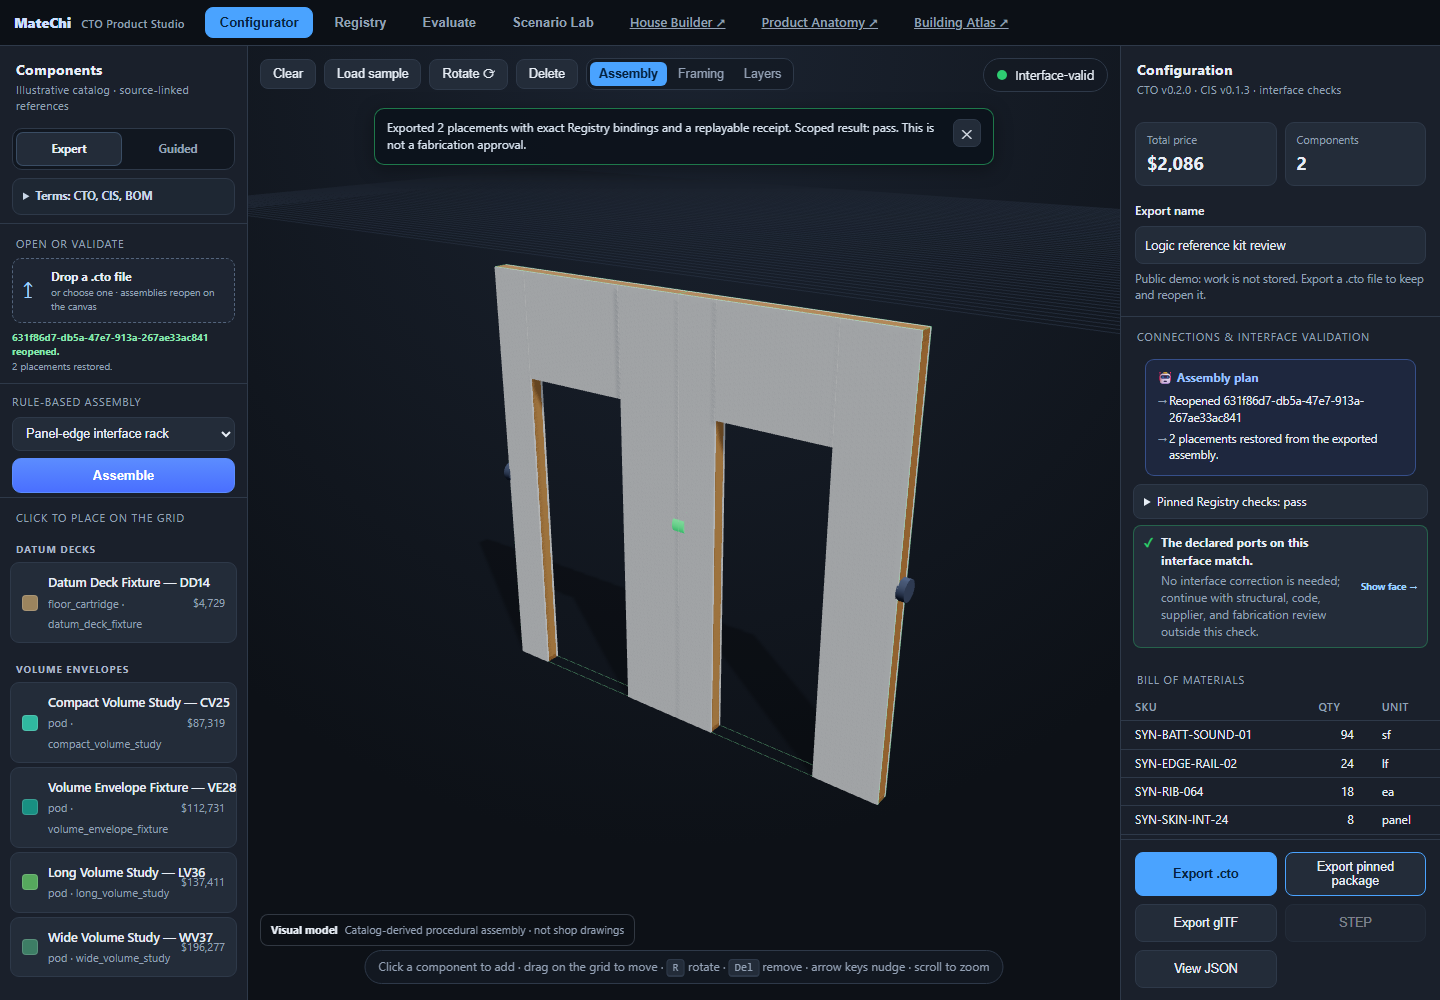
Open: Registry replay. Select Two matching wall edges, then Same-side mating, then One wall, no connection. Read the finding, not just its color.
Do: Expand Exact versions and provenance. Export the matching case as a pinned package. Open it in the Matechi workspace through its file input. Compare the product versions, snapshot digest and receipt digest. A different interface or export time should not silently substitute newer product data.
Say: “Pass means this declared interface check passed. It is not a structural pass. Fail means a known rule was not met. Indeterminate means the required facts or connection are absent. The two interfaces use the same kernel, so this shows shared-kernel replay, not independent-engine certification.”
Ask: “Is this the right minimum evidence to carry between tools?”
6:15–7:45
Separate visual detail from product evidence
Open: Product anatomy. Inspect the SIP opening, roof, floor cartridge, CLT or pod example. The generated library also includes a kitchen-pod bundle.
Do: Compare LOD 0 and LOD 2, show separated layers, use the part selector, then turn off Show labeled illustrative anatomy. Switch between 3D, Plan and Elevation. Try the center section and vector drawing.
Say: “More detail should make the unknowns easier to see, not disguise them. The six generated bundles are independent illustrations. They are not Logic or Freres product declarations. The CLT layup is illustrative and Kyle’s contribution is still pending.”
Ask: “What should be the minimum upload: a model, a drawing, a product sheet, or any one of those with gaps made explicit?”
7:45–9:00
Show the factory context honestly
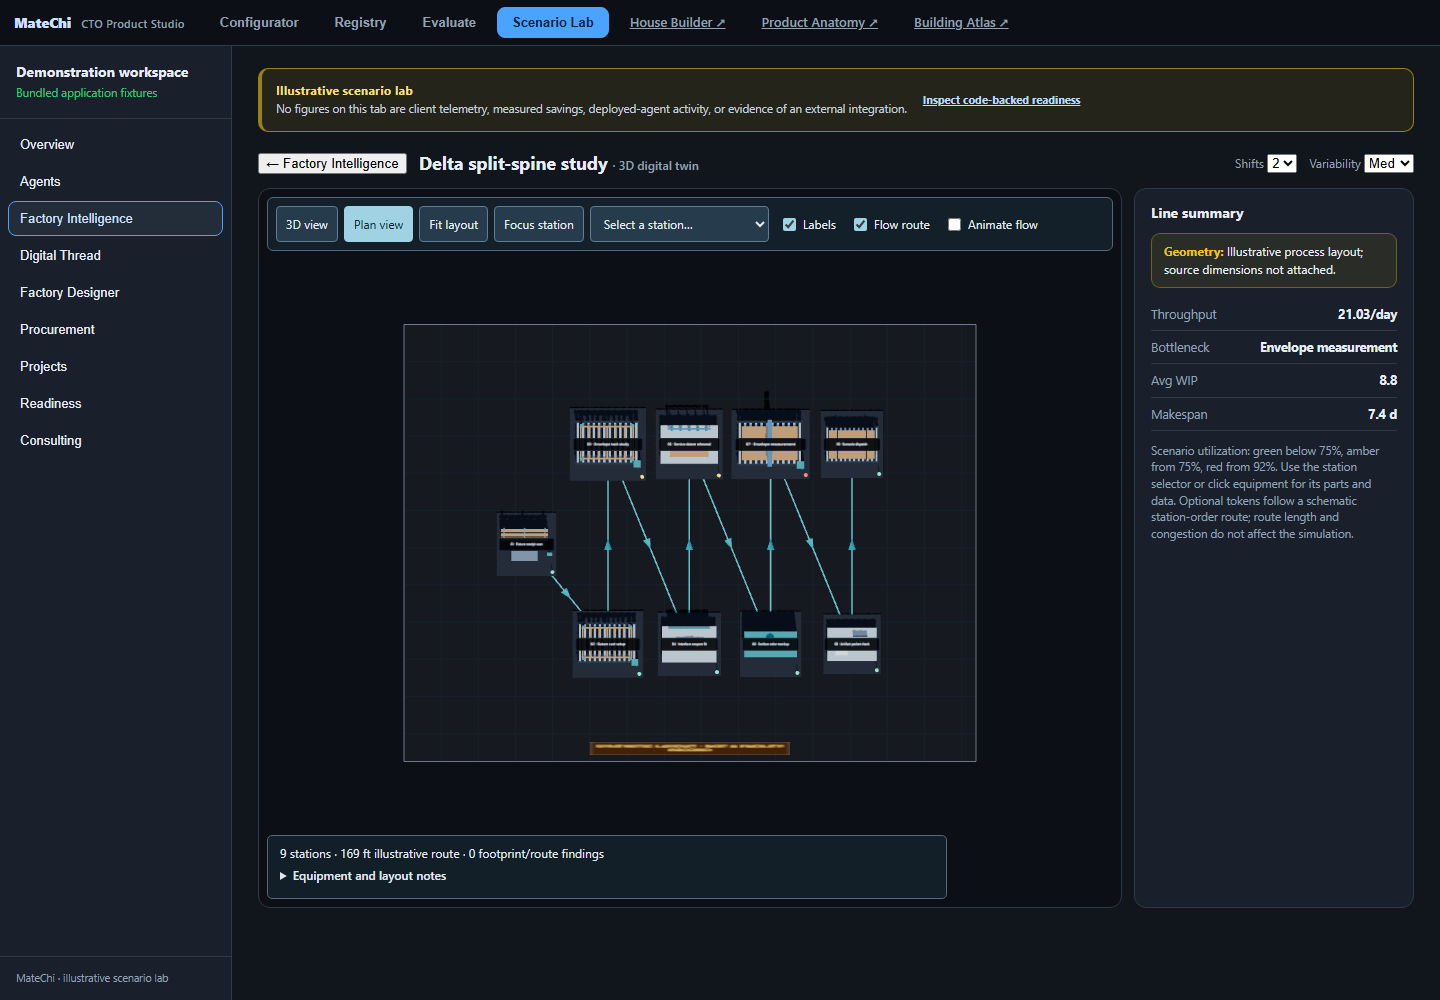
Open: Matechi factory study. Select station 7 and inspect the measurement gantry. Switch to Plan view, fit the layout, and open Equipment and layout notes.
Show: Named parts, upstream/downstream stations, directional route and footprint findings. Flow animation is optional and is not takt or telemetry.
Say: “This is a synthetic layout study. Equipment is recognizable but symbolic. We preserve the station footprints and report overlaps or route crossings. We have not verified working clearance, egress, transport or a real facility.”
Ask: “Which factory handoff would be useful first: a product count, a station assignment, or an evidence package tied to an order?”
9:00–10:00
End with a decision
Say: “I’d keep the next step narrow: agree on one product family, its authoritative interface facts and its review owner, then run it through this same loop.”
Confirm: Product mapping, required intake fields, publication owner, the first intended user and what would count as a useful next demonstration. Record unresolved questions rather than filling them with synthetic answers.
Inspect the supplied pod CAD
Open House builder, choose Pods, choose Empty study and load it. Choose the kitchen, bathroom or utility pod, add it on the Ground datum, then use Fit both views. Orbit to inspect the supplied geometry and compare the cut plan. The bathroom retains 237 supplied parts; the kitchen and utility contain 280 and 133 selected surface objects respectively.
Say: “We can now work with the supplied kitchen, bathroom and utility geometry. These are the archived models; if you have a newer revision, we can fold it in.”
The web models are source-derived tessellations, not native CAD. Exact geometry digests travel in the study package. Product boundaries for the kitchen and utility are inferred from separated source arrangements; current product revision, interfaces and installation placements remain unconfirmed. Optional illustrative components are separate.